“WooCommerce Shipping Icons And Description” Documentation by “Magerips
“WooCommerce Shipping Icons And Description”
By: Magerips
Email: rpmagerips@gmail.com
Thank you for purchasing my plugin. If you have any questions that are beyond the scope of this help file, please feel free to email via my user page contact form. Thanks so much!
Table of Contents
- 1. Introduction
- 2. Quick Start / Installation
- 2.1 Installation Details: Goto Plugins / Upload Plugin
- 2.2 Installation Details: Select ZIP file to upload
- 2.3 Installation Details: Activate Plugin
- 3. Settings
- 3.1 Go to plugin settings
1. Introduction - top
Thank you for purchasing WooCommerce Shipping Icons And Description. If you have any questions that are beyond the scope of this help file, please feel free to email via my user page contact form here or you can just E-Mail us. Thank you so much!
2. Quick Start / Installation - top
Installing WordPress Plugin via FTP client:
- connect to your server,
- navigate to the folder where your WordPress is installed,
- upload the rp-woo-shipping-icons-description (you can find this folder inside the plugin-folder in the zip-file you downloaded from CodeCanyon) folder into the wp-content/plugins directory (the path will look like this: wp-content/plugins/rp-woo-shipping-icons-description ),
- open the wp-admin panel (navigate through web browser to the folder where you have installed the WordPress e.g www.your_domain.com/wp-admin/),
- login to your wp-admin panel then from the sidebar on the left choose Plugins ,
- find the "WooCommerce Shipping Icons And Description" entry and click the Activate button next to it.
Installing Plugin via WordPress Admin Panel:
- open the wp-admin panel (navigate through web browser to the folder where you have installed the WordPress e.g www.your_domain.com/wp-admin/),
- login to your wp-admin panel then from the sidebar on the left choose Plugins,
- under Plugins choose Add New then Upload,
- you will be redirected to upload form, click the Choose file button and navigate to the unzipped package that you have download from CodeCanyon site, inside that package is a file called rp-woo-shipping-icons-description.zip choose it and click Open,
- once the plugin is done uploading it will automatically install,
- after the installation you will be able to activate the plugin, to do this click the “blue” activation link.
HINT: You will find more detailed installation instructions on the following pages.
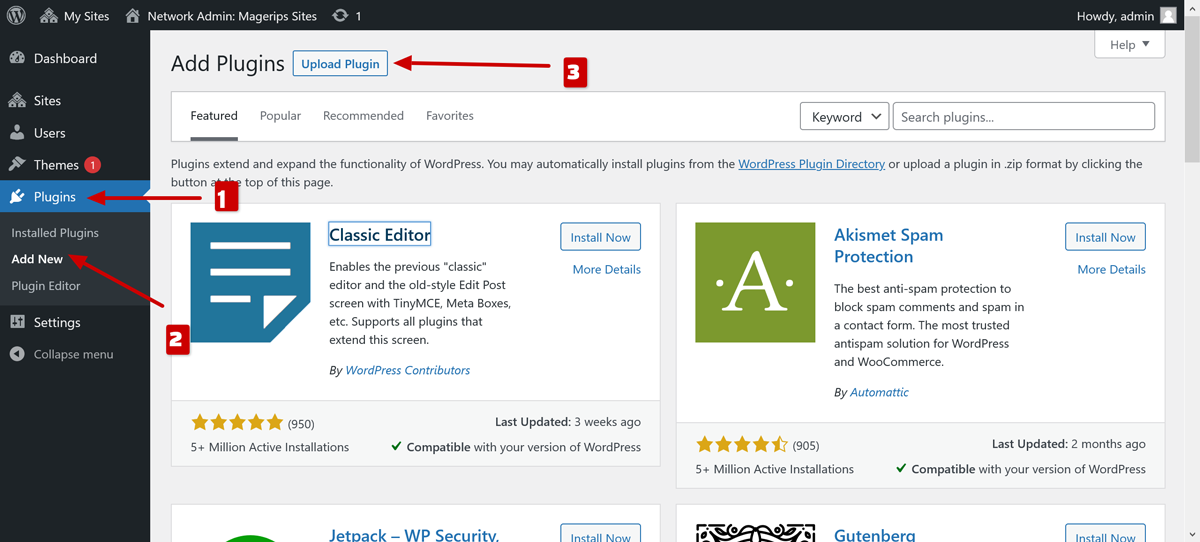
2.1 Installation Details: Goto Plugins / Upload Plugin - top
Open the wp-admin panel (navigate through web browser to the folder where you have installed the WordPress e.g www.your_domain.com/wp-admin/) and login as admin
- Klick on "Plugins" in the menu on the left
- Klick on "Add New"
- Klick on "Upload Plugin"
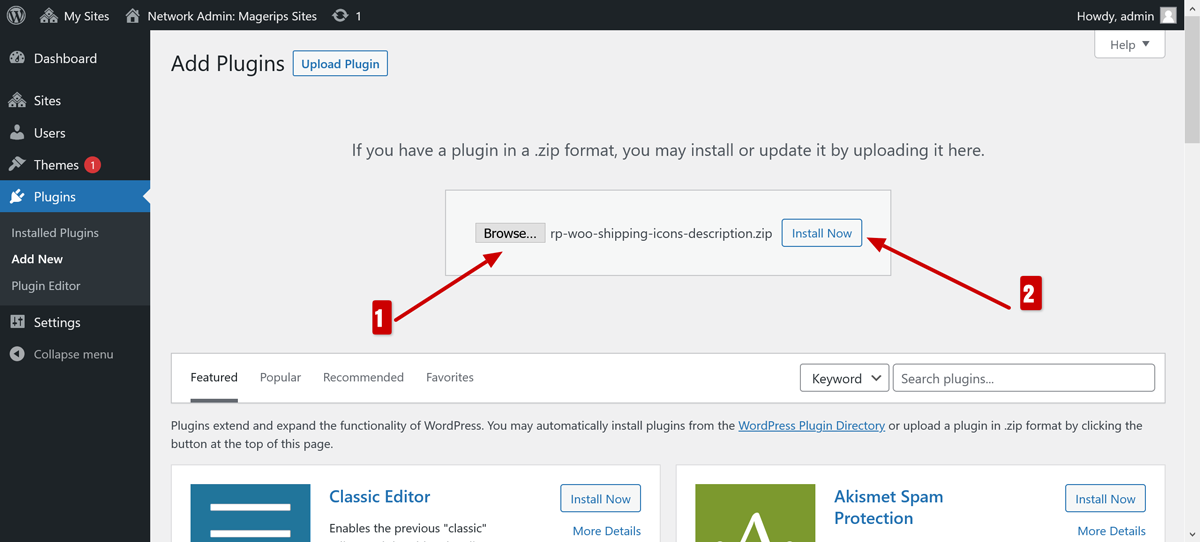
2.2 Installation Details: Select ZIP file to upload - top
- Klick on "Select File" button and choose "rp-woo-shipping-icons-description.zip" (you can find this file inside the plugin directory in the zip file downloaded from CodeCanyon). Alternatively you can just drag and drop the "rp-woo-shipping-icons-description.zip" file onto the "select file" button.
- Klick on "Install Now"
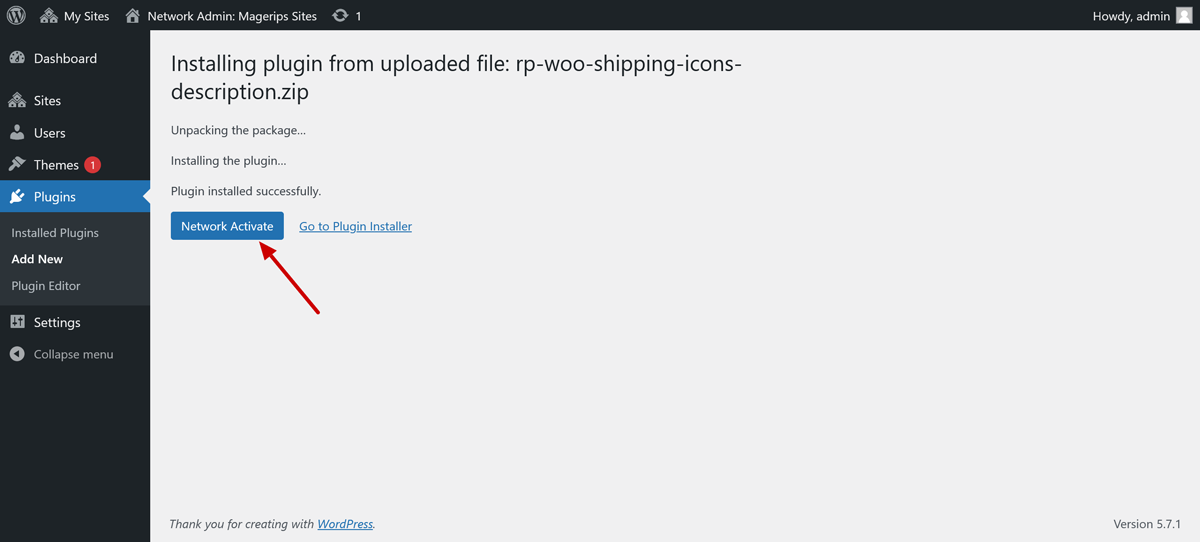
2.3 Installation Details: Activate Plugin - top
- Klick on "Activate Plugin"
- The plugin should be installed properly by now and you can continue by choosing your preffered display options. You can find more on all possible settings on the following pages.
Important: Please be aware that this plugin depends on WooCommerce. Please make sure you install the WooCommerce plugin first. If WooCommerce is not installed our plugin will deactivate automatically.
3. Settings - top
Your new plugin is highly configurable. The following pages will help you conquer our settings page.
3.1 Go to plugin settings - top
Open the wp-admin panel (navigate through web browser to the folder where you have installed the WordPress e.g www.your_domain.com/wp-admin/) and login as admin
- Klick on menu entry "WooCommerce"
- Klick on menu entry "Shipping Icons & Description"

You can set plugin settings from above page as per your requirement